Windows 11 has taken its first major update since it originally launched in October 2021, and now Windows 11 has started receiving the 22H2 updates. The updates are not completed, but windows 11 is searching quite differently with upgraded performances and new features or applications. With the 22H2, Microsoft has unified the video editor with the OS. So if you are looking for the best video editing tool, look no further. Just take a look at how to use the Clipchamp video editing tool.
Start Doing a Project with Clipchamp
To begin a project with the Clipchamp tool, you must launch the app and visit the homepage. Once you install the app, you can create your Clipchamp account, and this should be very easy if you have a Microsoft account linked to Windows 11.
- After setting up your Clipchamp account, go to the homepage and tap on the “Create a New Video” button. This option allows you to create a video with your own assets.
- After that, you have the option to begin with a new “Template.” There are various categories of templates available, like YouTube and Instagram. Text, video, and audio are other templates that can help you create a layout by adding the intro or outro. So choose the correct template and proceed with it.
- Next, you have to start “Recording.” Instead of starting with a template. You can begin the process with the recording option. To start recording, you can use your webcam and record screen. You can add a recording while editing too.
- When you start recording, you have to choose one option between a “Webcam” and a “Microphone.” Then hit the “Record” button to begin recording.
- You will be asked to select what you want to record if you are recording the screen. You can select to record the full screen, an app panel, or a specific screen area. The “Record System Audio” option is also available, but it is turned off by default.
- Once you select what you wish to record, the recording will be initiated. It can go for almost 30 minutes. You can choose to retake it for your project and also adjust the size and position of your project according to your needs.
Start using Clipchamp Video Editor in Windows 11
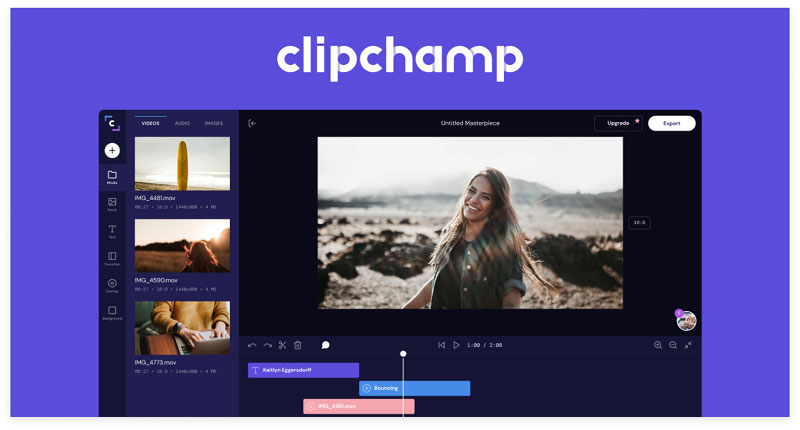
When you are done with creating the project, you will reach the video editing interface. Video editing is delightful to work with, and everyone has their way of moving forward. The interface of it is divided into sections. The front and center is a preview video option that will allow you to see the final result, and it’s essential.
You can also move and resize the video elements and change the ratio if you are going for a particular format. Below you will see how you can use the video timeline section, content and media tools, and the filters or effect section of Clipchamp.
- Timeline
Clipchamp is a multitrack tool for video editing, where you can add various video and audio files playing together. It is helpful if you are going to mix background music and recording of your voice or if you wish to have a superimpose of your camera on the top of the screen recording.
- You can move, delete and cut the assets on the timeline so you can split a video into unique clips. You can add more assets to your final video and drag them into the media panel.
- By default, the Clipchamp merges audio and video tracks. You need to be on the sentry for it. You can make the edits from the video track, but you can also split the audio track option.
- Media and Content Tools
After opening a project, you will see all the added media by default. But you still have the add more content option. Below you’ll see all the available options which you can use on your projects.
- Your media: With the help of this tool, you can add your own media to your project, but you need complete control to add it to the timeline. You can filter your existing media by type, which can be helpful when adding many assets.
- Record and create: You can record your webcam or your screen directly with Clipchamp. A text-to-speech tool is also available, so you can write the text incorporated as an audio file you can add to the video. You can also select multiple languages and voices from the text.
- Template: You can add pre-built templates like outros, intros, or splash screens. Templates can add multiple files like video, audio, and images.
- Music & SFX: This option is mainly for stock music and sound effects. Few assets are available with a free plan, but the essentials plans offer more options.
- Stock video: You can add the stock video footage from the Clipchamp library, but some are only available with a premium plan.
- Stock images: You can add images to your video from the Clipchamp library.
- Text: You can add the text to your created video, like subtitles, titles, screens, and lower third. You can upload your own if you have an essential plan.
- Graphics: You can also add background, GIFs, overlays, and stickers to your video.
- Transitions: You can add a transition effect which is useful when you are switching between various types of video files in the timeline.
- Filters and Effects
The filters and effects are accessible on the right side of the window 11 screens. You can apply these filters and effects to the content on your timeline. The available options depend on the content type you are selecting. Some options are accessible for the video, while some are for audio.
- Adjusts colors: You can change properties such as saturation, exposure, and contrast for the video, text, and image.
- Audio: You can change the audio track’s volume in your final video. For example, you can lower the volume for background music while keeping your own voice higher.
- Colors: You can change the text and background color.
- Fade: For the selected items, you can set the fade-in and fade-out animations.
- Filters: You can add filters to change the presence of images or video files.
- Speed: You can change the playback speed.
- Text: Change the text, alignment, and font of a text asset.
- Transform: Change the position and size of a text asset.
- Transition: Change the transition animation and duration for your transition asset.
- Exporting the Project
Once you are done using Clipchamp on Windows 11, you can export the final video. To do this, you just simply click the “Export” button. You can export your video in 480p to 1080p resolution and also export them as GIFs if they are 15 seconds long.
Clipchamp Plans (Free and Essential)
Clipchamp came with an intricate pricing plan with its initial release, and many considered it overpriced for what it provided. Microsoft changed all that very recently. They have announced a simple structure of pricing to erase all the confusion. Now, Clipchamp provides a free plan and an essential plan.
- Free plan: The free plan of Clipchamp has all the basic features and a multitrack video editor. You can use your assets and some stock assets from Clipchamp. A few assets of Clipchamp are free, but not all of them.
- Essential plan: The essential plan costs $11.99 per month or $119.99 yearly. It offers access to a wider array of stock assets, such as audio, video, and images. Essential plans also offer access to video filters and enable you to upload custom fonts. In addition, the biggest benefit of this plan is cloud backup. With this, you can back up your projects to the cloud and work on them from any PC and location.
Final Words
Clipchamp is a good video editing service that is available for free. If you compare it with Adobe Premiere, Apple’s iMovie, DaVinci Resolve, or Final Cut Pro, it will not affect you at all. But if you are learning video editing and need something simple for your work, Clipchamp is one of the best options. So if you are facing a problem using Clipchamp in windows 11, then the detailed read above will help you by giving proper guidance.